Activate the connector card on the Account page
Open the Account page and locate the Partner connector card. This form is the business-level definition of the connector. ProLogbooks stores one active connector for the account and later uses the saved URLs during check and sync operations.
The current UI requires a Check access endpoint URL and a Preview endpoint URL. The repo also keeps an optional content endpoint in the database schema, but the current code path does not call that third endpoint.

- Open Account and scroll to Partner connector.
- Enter an optional connector name that your business users will recognize.
- Enter the full HTTPS URL for the check endpoint.
- Enter the full HTTPS URL for the preview endpoint that returns flights.
- Save the card or activate the connector.
- If needed, use Set inactive when you want to keep the config but temporarily stop new checks and syncs.
Use the Check buttons on the Account page
After the connector card is saved once and the shared connector API key is visible, each endpoint URL field on the Account page shows a Check button. Use those buttons when you want to test the partner endpoint directly from the UI before asking a logbook user to run a real check or preview.
When you click Check, ProLogbooks opens a dialog with an autocomplete selector that searches the saved Connector users list for this account. After you choose the correct registered connector user, ProLogbooks reuses that user email address and saved user API key, calls your partner endpoint server-to-server with the connector API key in the `Authorization: Bearer ...` header, and shows the returned JSON in a result dialog.
The Preview endpoint test also sends the minimum required preview fields: `email`, `access_token`, an empty `synced_partner_item_uids` array, and the full `syncable_flight_columns` list. This matters because some partner preview endpoints refuse to answer unless those fields are present.
- Save the connector card first so the shared connector API key exists.
- Make sure the connector user you want to test already exists on the Connector users page.
- Return to Account and click Check beside the Check access endpoint URL or the Preview endpoint URL.
- Start typing in the dialog and select the matching registered connector user from the autocomplete list.
- Review the success or error message and read the JSON payload returned by the partner endpoint.
Read the connector API key correctly
After the connector is saved, the API key field becomes the shared secret between ProLogbooks and your partner server. ProLogbooks sends it in the `Authorization: Bearer ...` header whenever it calls your `checkuser` or `getnewids` endpoint.
Request new API key is a forced rotation. The old key is replaced immediately, so your server configuration must be updated at the same time or all new connector calls will start failing with unauthorized errors.
Authorization: Bearer lbc_your_connector_api_keyAllow users on the Connector users page
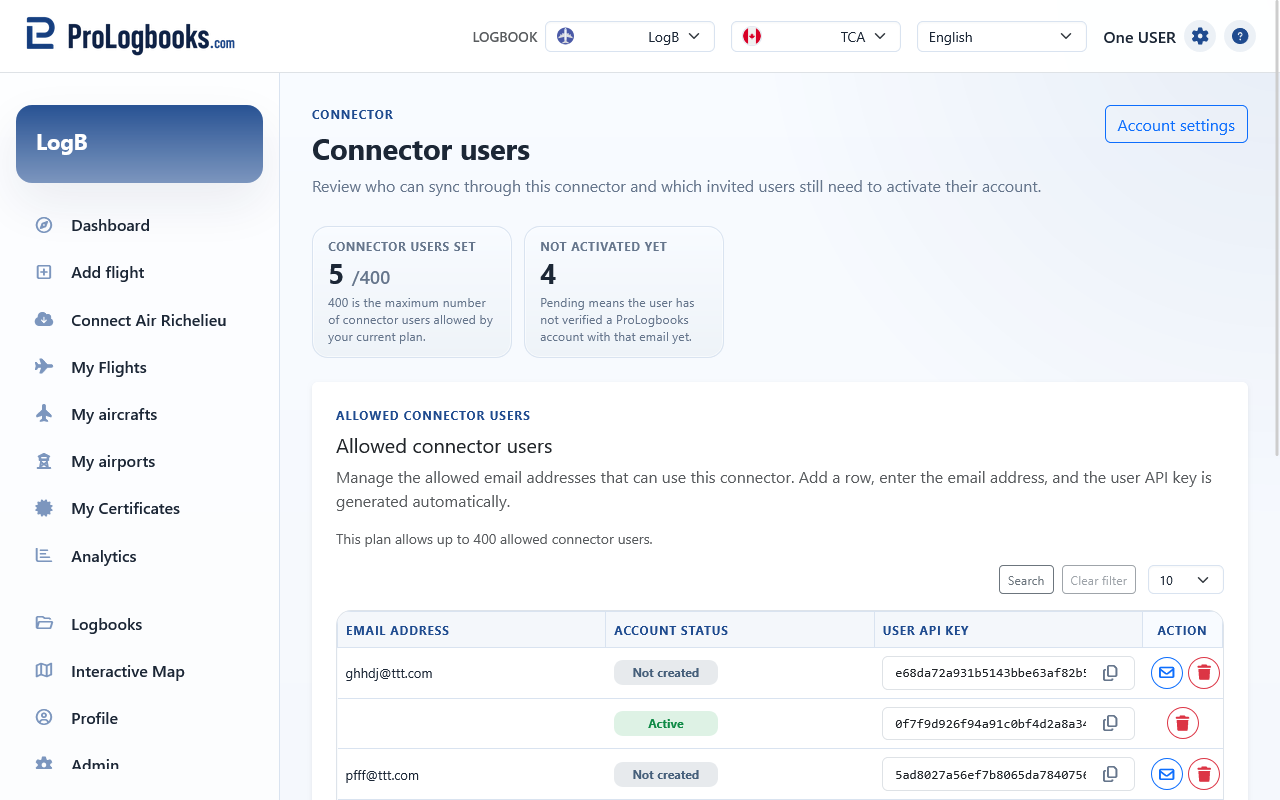
Select View users to open the Connector users page. Each row represents one ProLogbooks email address that is allowed to use your partner connector. When you save a new row, ProLogbooks automatically generates the user API key for that email.
That generated user API key is the same value the repo stores as `connector_access_emails.access_token`. Your server must store it too, usually beside the partner user record, because ProLogbooks sends it back later when the user runs Check, Preview, or Sync.
Account status tells you how far that email has progressed inside ProLogbooks. Not created means the email was allowed for the connector but no ProLogbooks account exists yet. Pending means the account exists but email verification is not finished. Active means the account exists and is verified.
{
  "email": "pilot.one@example.com",
  "access_token": "0f7f9d926f94a91c0bf4d2a8a34ebd799753a4a4d2fd2b380c53a72b0d5db04b",
  "status": "inserted"
}
- Add one email row manually or import a CSV list.
- Save the row so ProLogbooks generates the user API key.
- Copy the user API key and store it on your server for that exact email.
- Invite or re-invite the user if the status is Not created or Pending.
- Repeat for every email that your partner system must accept from ProLogbooks.
If something goes wrong
- If Save users fails, check for duplicate, empty, or invalid email addresses.
- If a copied user API key is blank, the row was not saved yet.
- If a Check button returns an error before calling the partner server, confirm that the connector card was saved first, that the endpoint URL is valid, and that the connector user you need already exists in the saved Connector users list.
- If Import list rejects the file, use a real `.csv` file with comma separators and at least one valid email address.
- If a user status stays Pending, that person still needs to confirm their ProLogbooks email before normal connector use.